
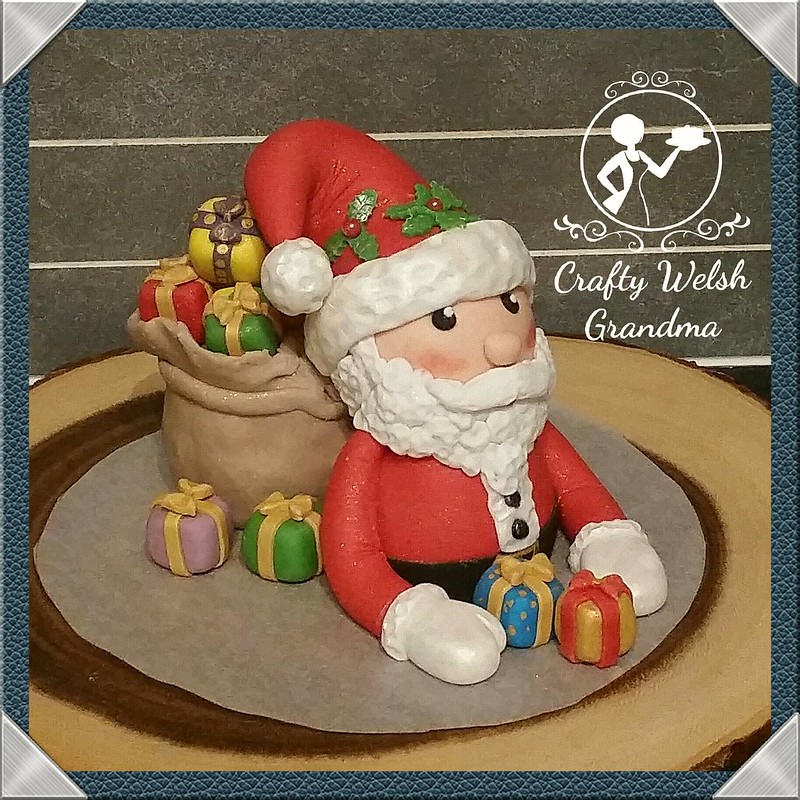
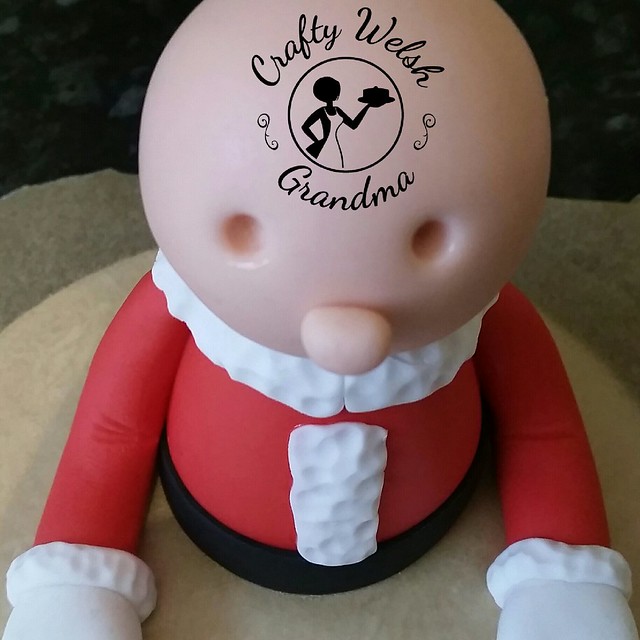
This rather handsome fellow is to adorn an upcoming festive cake and, if my calculations are correct, should just about fit from one edge to the other! At an amazing 12.5cm tall and about 1lb in weight, he is, by far, the biggest cutie I have ever made I think. At that weight, he can only adorn a super rich fruit cake.
I used:
- Renshaw's fondant in
- Red
- White
- Skin tone
- Black
- Various small amounts of other colours for 'gifts'
- Renshaw's modeling paste in
- Black
- Green
- Marshmallows
- Rice Krispies
- A plastic dowel
- Candy red berries
- Edible gold paint
- Edible pearl shimmer paint
- Edible gold luster dust
- Edible glue / water
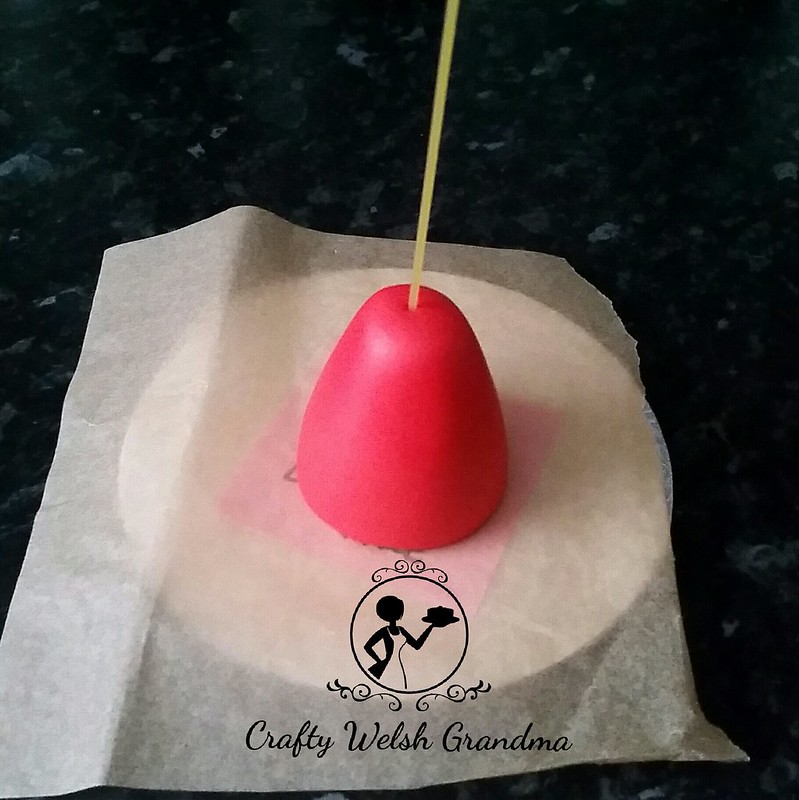
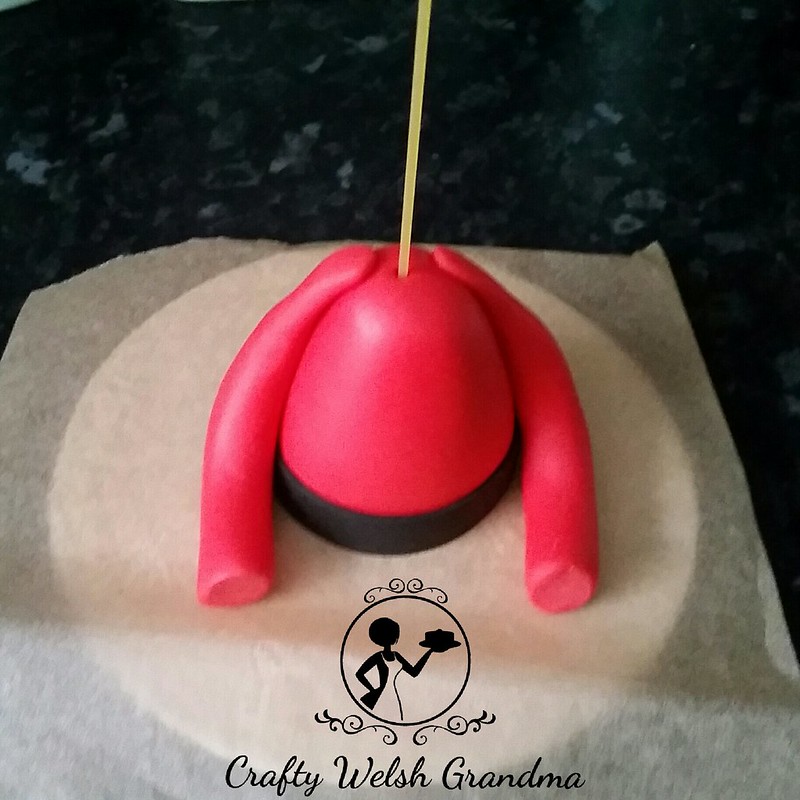
He started off as a ball of red fondant rolled into a cone. Into this I inserted a stick of dried spaghetti (as a dowel and because he might be eaten). Little did I realise that this was not going to be enough to stabilise him as he grew. I would later use a plastic dowel.
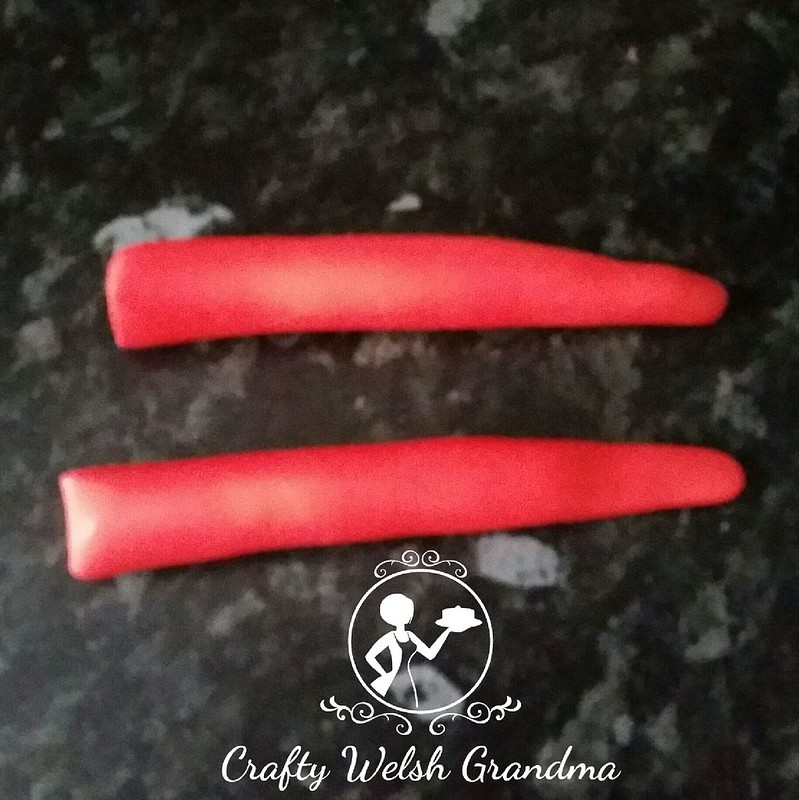
My next task was the arms, I rolled a long sausage shape and cut it in half. Then I measured them against the body, trimmed them and removed them. I will later come to realise that they will need further trimming as they were too long.
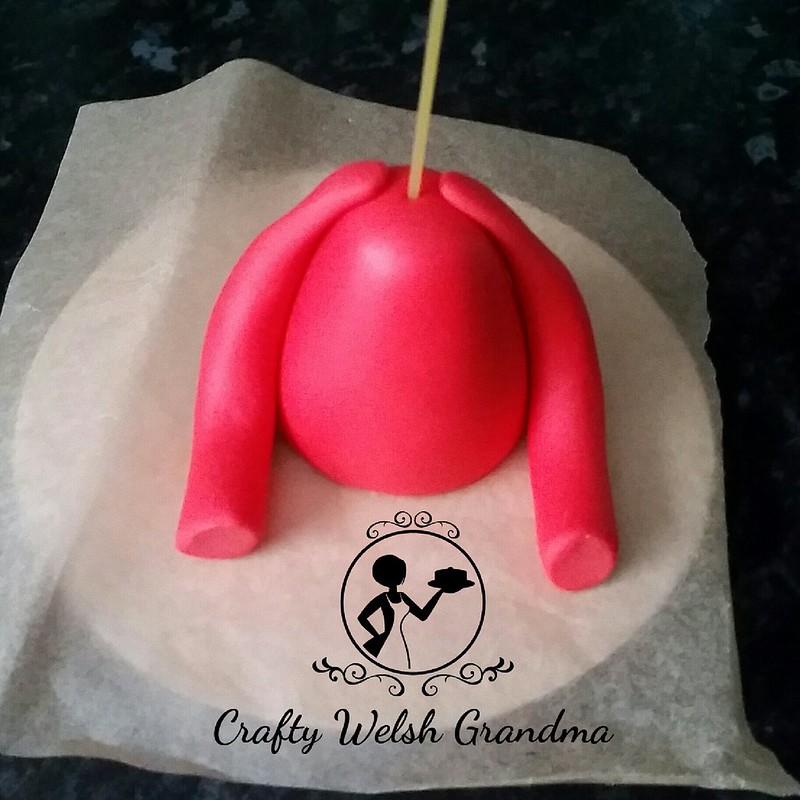
I removed them and rolled a strip of black modelling paste about 1cm thick, and fixed this on for his belt. I will later pain on the gold buckle.
I fixed the arm on with the belt in place
Next, I rolled a suitably sized, skin tone, ball for the head and fixed it onto the spaghetti dowel.

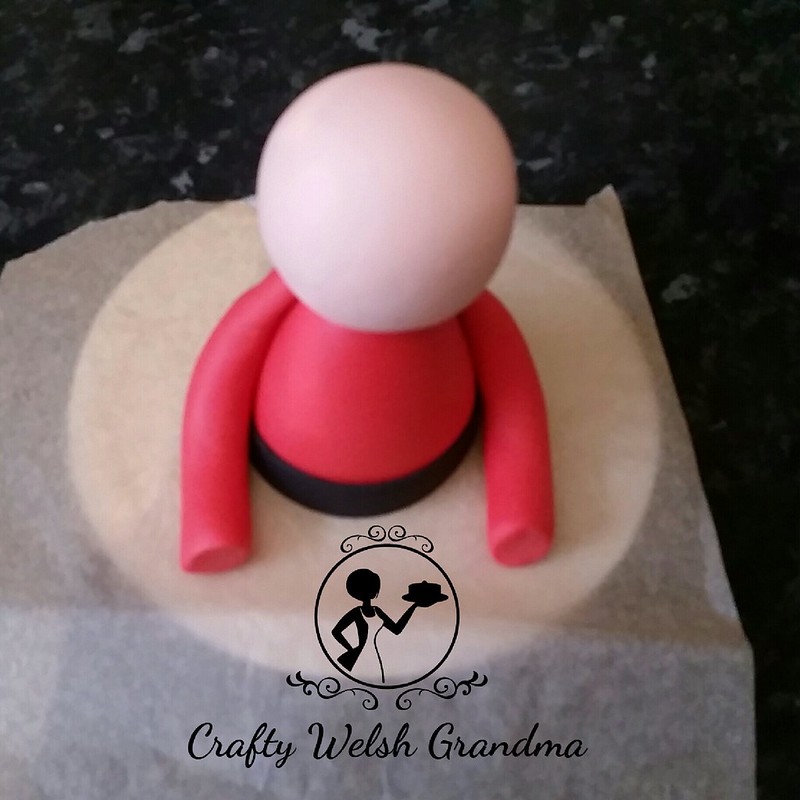
He needed to dry and harden a little, before I added more.
I marked the face with some dots in preparation for his eyes and nose, but I didn't make these right away.

I decided that he needed his fur trim before I did his face as well as his gloves and the trim on those.
I rolled out a small sausage and flattened it with my hand, you don't want these looking too perfect, after all, it's meant to be fur. I made indents all along the facing side and down the edges, measured it around the neck, cut it to size and fixed it on, with the join at the front. Next for a strip up the front. As you can see, I made this too short, but I'm not going to worry because his beard will cover that later. I made sure it was thinner at the bottom so it didn't look bulky above the belt.

For his hands / gloves I rolled two balls of white, then rolled them slightly sausage shape and flattened them a little. Tap the one side, that will fix to his arms, a little flatter where you know it's going to meet the rest of the arm. It was about here I realised that his arms were too long with the hands and needed shortening. So I did this.

I made a thumb by using my cutting tool and gently moulded each one, to take the sharp sides away, then inserted a piece of dried spaghetti into the ends of his arms, added some glue and gently pushed his hands on. For the fur trim, follow the same process as above and glue this on where the gloved meet the sleeve ends.

Next I inserted my ball tool into where I had placed the marks for his eyes and nose. For his nose, I rolled a small ball, then shaped it into a capsule shape, in proportion (I had to trim this a few time before I fixed it on as it looked far too comical) and fix on the face.
For his eyes, I rolled two small balls of black fondant, added a dab of glue into the eye holes and inserted them. I then pushed them in to flatten them a little as they looked silly just sticking out.

Follow the same process, as they eyes, for his three buttons down the front of his jacket.
Now for that beard. I needed to bulk up the area under his chin first, so I made a strip, exactly the same as I did for the fur trim, and fixed it down the side of his face, under his chin and up the other side. Whilst it was in place, I used my ball tool to add extra indents to fake fluffy beardy hair.
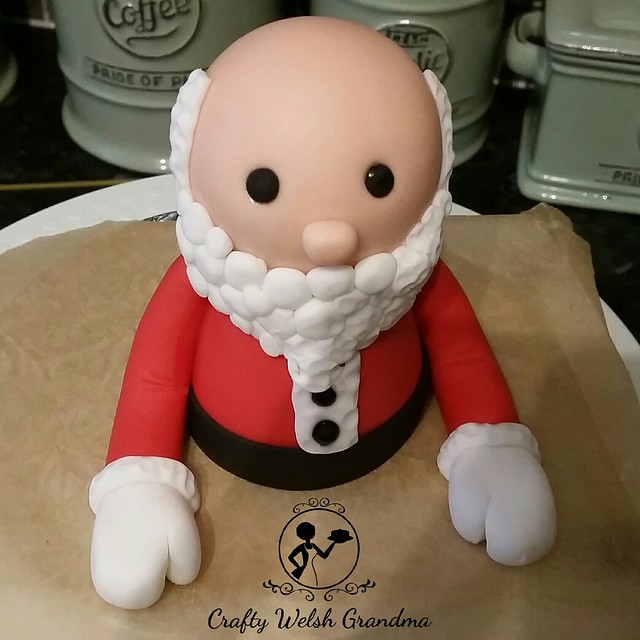
Now, I just rolled lots of tiny balls and stuck them onto his face to make the basic beard shape ensuring that there are no gaps showing the under side. Once this was complete, I used a small ball tool to impress little dents all around his beard.
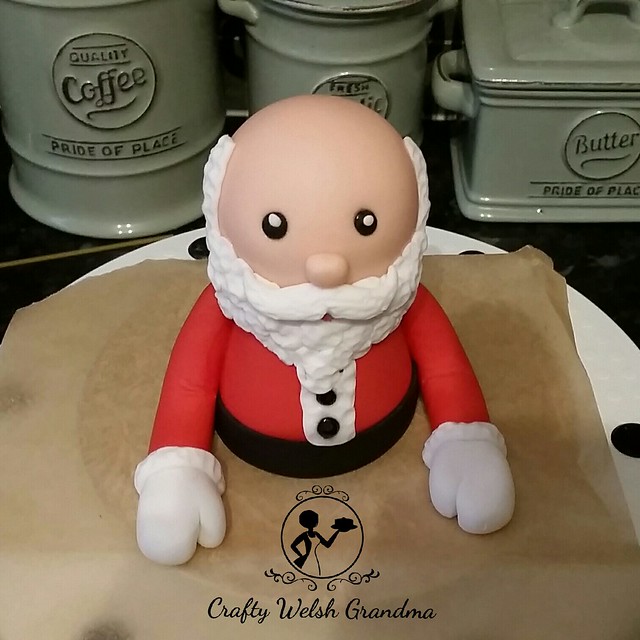
Not shown here is, a tiny little love heart I cut and placed under his nose, this will hopefully show through as his mouth. For the moustache, I rolled a small sausage shape and tapered it off to small points on both sides. I used a blade tool to press in the middle to give the impression of two sides of a moustache and bring it up and over the little love heart. I used the blade tool to place lines horizontally across the moustache to give the impression of hair.
I also noticed I had forgotten to highlight the eyes. So I tolled two of the tiniest little balls of white, glued them on at the top of the eyes off to one side, then flattened them to secure them on.

For the hat, I went back to the red fondant and rolled a ball. This was then shaped into a long cone and, using the same method as the gingerbread people hats tried it for size. I had to trim quite a bit off at first as it was far too big.
A added another piece of dried spaghetti down through the head to stabilise the hat when it's on.
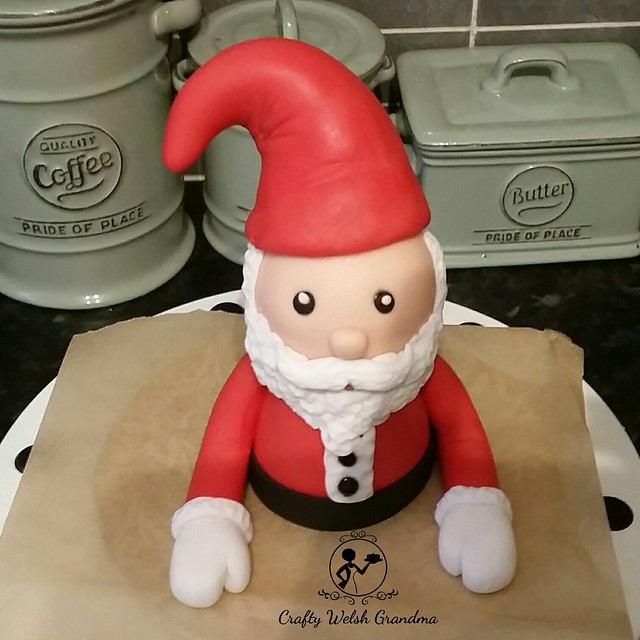
Tilting his little hat over to one side before I put in on, then glued it and allowed it some time to dry. It was about now that I noticed his beard needed a few extra balls to finish it off around the sides, so I did that.
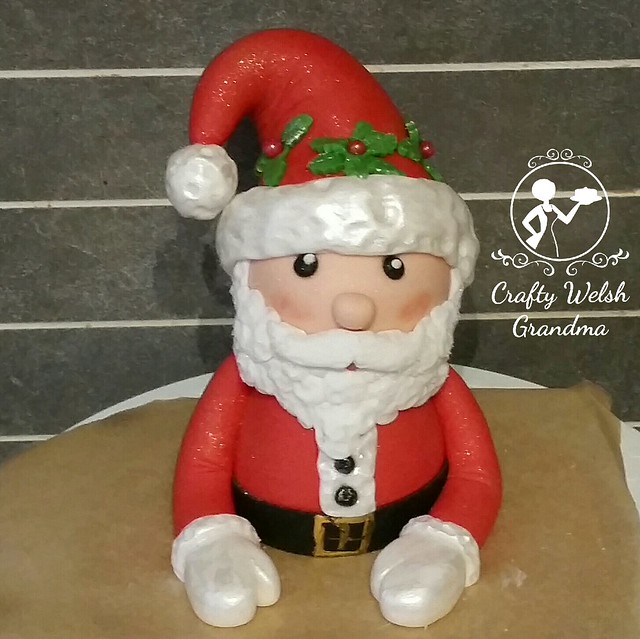
It was about now I realised that this spaghetti dowel just couldn't 'cut the mustard' and was failing, I inserted a plastic dowel down the middle, from his hat to his waist. I then had to cover the hole I'd made, so added some holly decorations to his hat, and whilst I was there, painted all the white fur parts with a pearl paint, but not the beard and hair. Then allowed him to dry.
Time to give this half a dude the sack!
He's already super heavy, so I have to keep it light! I've never actually worked with a marshmallow and crisped rice mix, so there's a first time for everything I guess.
I had no idea and no recipe, but I guessed it should be as easy as rice krispie and chocolate things.
I microwaved half a dozen marshmallows, gave it a mix then ...

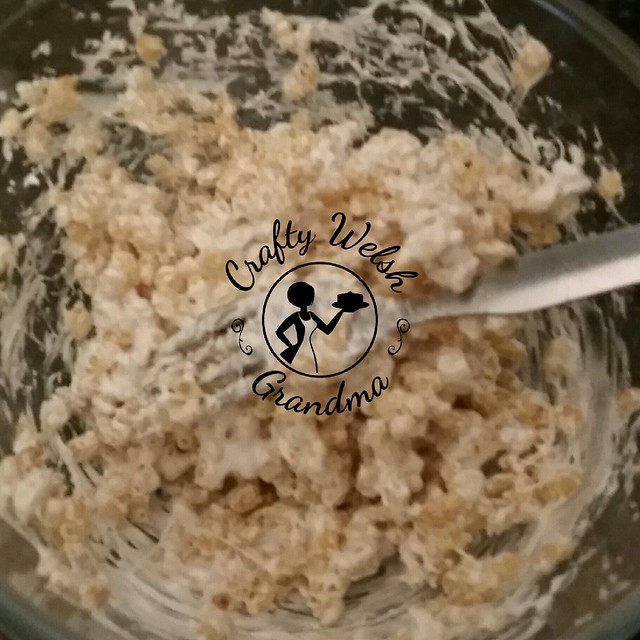
... mixed in the crisped rice until it looked good. It seemed to have worked. I needed the sack covered in fondant and to look lumpy and scruffy.
Having squashed and shaped the krispie ball, I allowed it to harden. Then I rolled out a base, then rolled out a thin piece for the top (inside the sack) and then rolled out a thick strip. I covered the sides of the sack and made sure it was taller than the krispie ball as I wanted an open top sack. Using a piece of washed and cleaned fruit bag netting, I made impressions around the sack to make it look, well, like a bumpy old sack!


My daughter had helped me make some fondant presents with ribbons and bows, these were added to the sack and around the fugue, these will be glued on at a later date.
For now, this figure is living in an air tight drying box until needed. Check back for the cake that this will adorn this festive season.

No comments:
Post a Comment